How to Inject Peptides Subcutaneously: The Complete Guide
Last updated: April 14, 2026 · 14 min read · By the Grey Peptides Editorial Board · ✓ Cited Sources
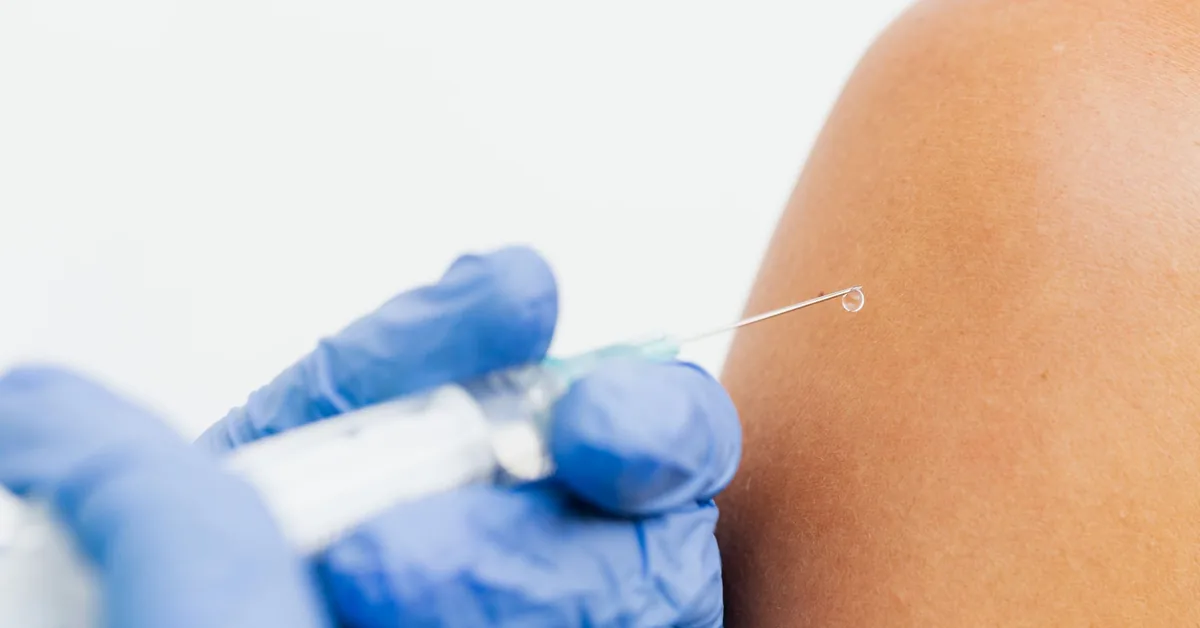

Subcutaneous (SubQ) injection means injecting into the fat layer between the skin and muscle using a short, fine insulin syringe (29–31 gauge). Pinch a fold of skin, insert the needle at a 45–90° angle depending on body fat thickness, push the plunger slowly and steadily, wait 5 seconds before withdrawing, and apply light pressure with a cotton ball. The abdomen (2 inches from the navel) is the most common site, but the thigh, upper arm, and lower back are also effective. Rotate injection sites to prevent lipodystrophy3. The entire process takes under 60 seconds once you've drawn your dose.
→ Need to calculate how many units to draw for your dose? Use the Reconstitution Calculator.
→ First time with peptides? Start at the Beginner's Guide.
Table of Contents
- What Is a Subcutaneous Injection?
- SubQ vs Intramuscular: Which to Use
- Equipment You'll Need
- Step-by-Step Injection Process
- Injection Site Guide (Body Map)
- Site Rotation Strategy
- Injection Timing for Common Peptides
- Reducing Pain & Discomfort
- Troubleshooting Common Issues
- Frequently Asked Questions
- Sources
What Is a Subcutaneous Injection?
A subcutaneous injection delivers a substance into the subcutaneous tissue — the layer of fat that sits between the dermis (skin) and the fascia covering the muscle beneath. It's the same injection type used by millions of people daily for insulin, GLP-1 agonists (semaglutide, tirzepatide), blood thinners (enoxaparin), and fertility medications.
For peptide administration, subcutaneous injection is the default route. Nearly all research peptides — BPC-157, TB-500, CJC-1295, Ipamorelin, GHK-Cu, PT-141, and others — are designed for SubQ delivery. The injection is performed with a standard insulin syringe, which has a very fine needle (29–31 gauge, 8–12 mm length) designed specifically for comfortable SubQ use.
SubQ injection offers several advantages for peptides. The relatively slow absorption from subcutaneous fat creates a sustained release effect, extending the peptide's effective duration. The fat layer is well-supplied with blood vessels (but not as densely as muscle), providing reliable absorption while avoiding the faster spike-and-drop pattern of intramuscular injection. And practically speaking, SubQ sites (abdomen, thigh) are easily self-accessible, whereas many IM sites (gluteus, deltoid) are harder to reach alone.
SubQ vs Intramuscular: Which to Use
Almost all peptides are administered subcutaneously. The question of SubQ vs IM arises only for a few specific compounds or situations.
When to Use SubQ (Default)
Use subcutaneous injection for: BPC-157, TB-500, CJC-1295, Ipamorelin, Sermorelin, Tesamorelin, GHK-Cu, PT-141, MOTS-c, Epithalon, Semaglutide, Tirzepatide, and the majority of other research peptides. SubQ is the administration route used in the underlying research for these compounds, and it's the route that clinical protocols follow.
When IM May Be Considered
A small number of situations where intramuscular injection is discussed:
HGH (recombinant human growth hormone) — FDA-approved formulations can be given either SubQ or IM, though SubQ is standard for convenience and comfort.
Large-volume injections — If a single dose requires more than 1 mL of liquid (uncommon with peptides), IM injection may absorb the volume more comfortably than SubQ.
Specific clinical protocols — Some practitioners use IM injection for localized delivery near a deep tissue injury, though this is less common than local SubQ injection.
Key Differences
| Factor | Subcutaneous | Intramuscular |
|---|---|---|
| Needle gauge | 29–31 (fine) | 22–25 (larger) |
| Needle length | 8–12 mm | 25–38 mm |
| Injection angle | 45–90° | 90° |
| Absorption speed | Moderate (gradual) | Faster |
| Pain level | Minimal | Moderate |
| Self-injection ease | Easy | Harder (site dependent) |
| Common sites | Abdomen, thigh, arm | Gluteus, deltoid, vastus lateralis |
→ For a deeper comparison of subcutaneous vs intramuscular injection, see the FAQ section below.
Equipment You'll Need
Gather everything before you begin. A clean, well-lit workspace with all supplies within reach minimizes interruptions and contamination risk.
Required
Insulin syringe (U-100). This is your injection syringe. Available in three sizes:
- 0.3 mL (30 units) — Best for doses under 25 units. The smaller barrel makes tiny volumes easier to read accurately.
- 0.5 mL (50 units) — The most versatile size. Good for doses up to 40 units.
- 1.0 mL (100 units) — For larger doses or multi-peptide draws. More difficult to read very small volumes accurately.
Choose the smallest syringe that comfortably holds your dose. Smaller barrels have finer graduation markings, which means better dosing precision.
Alcohol swabs. 70% isopropyl alcohol pads. You'll use one to clean the vial stopper and one for the injection site. Buy them in individually wrapped packets — these stay sterile until opened.
Your reconstituted peptide vial. Remove it from the refrigerator 5–10 minutes before injection. A slightly warmer (but still cool) solution is slightly more comfortable than ice-cold liquid.
Sharps container. For safe disposal of used syringes. A rigid, puncture-resistant container with a sealable lid. Commercial sharps containers are available at any pharmacy; a thick plastic laundry detergent bottle works as a temporary alternative.
Optional but Recommended
- Cotton balls or gauze pads (for post-injection pressure)
- Adhesive bandages (occasionally needed if a site bleeds slightly)
- Sterile nitrile gloves
- Good lighting (a desk lamp or bathroom vanity light)
- A mirror (helpful when injecting the abdomen)
- Injection tracking log or app
→ See the full interactive supply checklist at the Mixing & Administration Guide.
Step-by-Step Injection Process
Step 1: Wash Your Hands
Wash with warm water and soap for at least 20 seconds. Dry with a clean towel. If using gloves, put them on after hand washing.
Step 2: Prepare the Vial
Remove the peptide vial from the refrigerator. Flip off the plastic cap (if still present) to expose the rubber stopper. Swab the rubber stopper with an alcohol pad using firm, even pressure. Let the alcohol air-dry completely — about 15 seconds. Do not blow on it.
Step 3: Draw Your Dose
Remove the insulin syringe from its sterile packaging. Pull the plunger back to draw air into the syringe — draw the same amount of air as the liquid dose you plan to withdraw (e.g., if your dose is 10 units, draw 10 units of air).
Insert the needle through the rubber stopper. Push the air into the vial. This equalizes pressure inside the vial and makes it easier to withdraw the liquid.
Invert the vial so the stopper faces downward. Position the needle tip so it's submerged in the liquid. Slowly pull the plunger down to draw your dose. Draw slightly more than you need.
Check for air bubbles. If present, gently flick the syringe barrel with your finger to move the bubbles to the top (near the needle). Push the plunger up slowly to expel the air back into the vial. Adjust until you have the exact dose with no visible air at the top.
Withdraw the needle from the vial. Set the vial down and return it to the refrigerator after your injection.
→ Not sure how many units to draw? Enter your vial size and desired dose in the Reconstitution Calculator — it shows the exact syringe markings to target.
Step 4: Prepare the Injection Site
Choose your injection site (see the body map section below). Clean the area with a fresh alcohol swab in a circular motion, starting at the center and spiraling outward about 2 inches. Let air dry completely.
Step 5: Perform the Injection
Pinch. With your non-dominant hand, pinch a fold of skin and fat at the injection site. Pinch firmly enough to lift a 1–2 inch fold, but not so hard that it's painful. Hold the pinch throughout the injection.
Angle. If you can pinch a generous fold of fat (more than 1 inch), insert the needle at 90° (straight in). If the fat layer is thinner, insert at a 45° angle. The goal is to deposit the liquid in the fat layer, not in the muscle below.
Insert. In a smooth, quick motion, push the needle all the way in. The fine insulin needle is designed to enter the skin easily — a quick, dartlike motion is more comfortable than a slow push. You should feel minimal pain. If you hit a nerve and experience sharp pain, withdraw and try a spot nearby.
Inject. Push the plunger slowly and steadily. A 10-unit dose should take about 3–5 seconds to inject. Faster injection speeds can cause more local discomfort and bruising. There is no benefit to injecting quickly.
Wait. After the plunger is fully depressed, hold the needle in place for 5 seconds. This allows the liquid to fully deposit in the tissue and prevents leakback through the needle track.
Withdraw. Pull the needle straight out along the same angle it entered. Release the skin pinch.
Post-injection. Apply gentle pressure with a cotton ball or gauze for 10–15 seconds. Do not rub — rubbing can spread the injected liquid and cause bruising. A small drop of blood at the site is normal and harmless.
Step 6: Dispose Safely
Immediately place the used syringe in your sharps container. Never recap an insulin needle — this is the most common cause of accidental needlesticks. Never reuse a syringe.
Injection Site Guide (Body Map)
Primary Sites
Abdomen (most common). The area around the navel is the most popular injection site for peptides. It offers a large surface area, generous subcutaneous fat in most people, easy self-access, and reliable absorption.
- Zone: A circle approximately 2 inches (5 cm) from the navel in all directions, excluding the navel itself. Avoid the exact midline.
- Why it works: The abdomen typically has consistent subcutaneous fat depth, making it easier to ensure proper SubQ placement. Absorption from abdominal fat is predictable.
- Best for: All peptides. Particularly recommended for GI-targeted peptides like oral BPC-157.
Upper outer thigh. The front and outer surface of the thigh, approximately in the middle third between hip and knee.
- Zone: Front and slightly lateral surface. Avoid the inner thigh (more sensitive, more blood vessels).
- Why it works: Large surface area with good SubQ fat in most people. Easily self-accessible.
- Best for: BPC-157 for lower extremity injuries, general rotation site.
Back of the upper arm. The fatty area on the back/outer surface of the upper arm, between shoulder and elbow.
- Zone: Outer/posterior surface of the mid-upper arm. Avoid the inner arm.
- Why it works: Good SubQ fat layer. May require assistance from another person for proper technique.
- Best for: Rotation site, upper body injury support.
Local Injection for Injuries
For repair peptides like BPC-157, injecting near the injury site is standard practice. "Near" means within 2–4 inches of the injury in the subcutaneous fat layer — not into the joint capsule, tendon, or wound directly.
Shoulder injury: SubQ in the deltoid fat pad or anterior shoulder fold.
Knee injury: SubQ in the fat pad just above or to the side of the kneecap, or in the thigh fat a few inches above the knee.
Elbow/wrist: SubQ in the forearm or upper arm fat nearest to the injury.
Low back: SubQ in the lateral lower back fat pad (love handle area), or have a partner inject the central lower back.
The peptide does not stay at the injection site — it migrates through local tissue and enters the bloodstream. Local injection simply maximizes initial concentration in the nearby tissue.
→ Explore injection sites interactively at the Mixing & Administration Guide.
Site Rotation Strategy
Repeatedly injecting the same spot can cause lipodystrophy — localized changes in the subcutaneous fat layer that appear as lumps, dimples, or hardened areas. This is well-documented in long-term insulin users and applies to any subcutaneous injection regimen.
The Clock Method
Imagine a clock face around your navel. Each injection goes at the next "hour" position:
- Injection 1: 12 o'clock (above navel)
- Injection 2: 2 o'clock
- Injection 3: 4 o'clock
- And so on...
This gives you 12 distinct sites before you return to the starting position. With twice-daily dosing, you cycle through all 12 sites in 6 days.
Multi-Region Rotation
For protocols requiring frequent injections (BPC-157 twice daily), rotate between regions:
- Morning: abdomen
- Evening: thigh (or alternate thigh)
Or use a 3-region rotation — abdomen, left thigh, right thigh — cycling through over days.
Spacing Rules
Keep each injection at least 1 inch (2.5 cm) from the previous site. If you notice any lump, hardness, or skin change at a site, exclude that site until it fully resolves. Track your rotation in a notebook or phone app if you're running multi-peptide protocols.
Injection Timing for Common Peptides
Timing matters for some peptides because of interactions with food intake, sleep, or natural hormone rhythms.
| Peptide | Optimal Timing | Why |
|---|---|---|
| BPC-157 | Morning + evening, with or without food | Twice-daily dosing maintains stable levels given its ~4-hour half-life |
| TB-500 | Any time of day | Long half-life (~24 hours) makes timing less critical |
| CJC-1295/Ipamorelin | Before bed, on an empty stomach | GH release is highest during deep sleep; food (especially carbs/fats) blunts GH secretion |
| Sermorelin | Before bed, on an empty stomach | Same rationale as CJC-1295 |
| Tesamorelin | Morning, on an empty stomach | FDA label specifies morning administration |
| PT-141 | 2–4 hours before anticipated need | Onset of effects takes 1–3 hours |
| GHK-Cu | Morning or evening | No strong timing dependency |
| Semaglutide | Same day each week, any time | Consistent weekly schedule matters more than time of day |
Food Interaction Notes
Growth hormone secretagogues (CJC-1295, Ipamorelin, Sermorelin) should be injected on an empty stomach — ideally 2+ hours after eating and 30+ minutes before eating. Blood sugar and insulin spikes from food blunt the GH release that these peptides stimulate. This is why bedtime dosing (at least 2 hours after dinner) is the standard recommendation.
BPC-157 and TB-500 are not meaningfully affected by food intake timing. You can inject these regardless of meal timing.
→ Build a personalized injection schedule with the Protocol Builder.
Reducing Pain & Discomfort
Subcutaneous injections with insulin syringes are genuinely low-pain for most people — many describe the sensation as less painful than a mosquito bite. But if you're needle-averse or experiencing discomfort, several techniques help.
Let the solution warm slightly. Remove the vial from the refrigerator 5–10 minutes before injection. Cold liquid can cause mild stinging. You want it cool, not ice-cold.
Use a quick, dartlike insertion. Hesitating at the skin surface — pressing slowly — engages more pain receptors than a swift, confident push. Think of it like removing a bandage: fast is better.
Inject slowly. The needle insertion should be quick, but the liquid injection should be slow. Pushing 10 units over 3–5 seconds is comfortable. Pushing it in 1 second creates local tissue pressure that stings.
Numb the site. An ice cube held on the injection site for 30–60 seconds before injection reduces nerve sensitivity. Remove the ice, swab with alcohol, let dry, then inject.
Rotate consistently. Fresh sites with no recent injection history are less sensitive than sites that were used recently.
Try different regions. Some people find abdominal injections painless but thigh injections uncomfortable (or vice versa). The nerve density varies between anatomical regions and between individuals.
Relax the muscle. If you're tensing the muscle beneath your injection site, relax it. A relaxed posture makes needle entry smoother. For abdominal injections, sit upright or lie down — don't crunch forward.
Troubleshooting Common Issues
Small amount of blood at the injection site. Normal. You nicked a superficial capillary. Apply pressure with a cotton ball for 30 seconds. No impact on the peptide dose.
Bruising at the injection site. Common, usually harmless. Caused by hitting a small blood vessel. If you notice frequent bruising at one area, shift your rotation to different sites. Some people bruise more easily due to genetics, blood thinners, or supplements like fish oil.
Lump or welt at the injection site. A small raised area immediately after injection is normal — it's the injected fluid sitting in the SubQ space before dispersing. It should flatten within 30–60 minutes. If a lump persists for days or becomes hard, you may have injected too superficially (intradermally) or too many times in the same spot.
Stinging during injection. Usually caused by cold solution, fast injection speed, or the benzyl alcohol preservative in BAC water. Slow down your injection speed and let the vial warm slightly before drawing.
Liquid leaking back after withdrawal. You withdrew the needle before the liquid fully deposited. Hold the needle in place for a full 5 seconds after the plunger is fully depressed. If leakback persists, try the "Z-track" technique: pull the skin laterally before inserting, inject, wait, withdraw, then release the skin — the skin layers offset the needle track.
Can't get air bubbles out. Small air bubbles (less than 2–3 units) in a SubQ injection are harmless. They cause a small air pocket under the skin that absorbs within minutes. Only intravenous air injection is dangerous — SubQ air is not a safety concern.
Needle bends during insertion. Rare with insulin needles but possible. Discard the bent needle immediately and use a new syringe. Never attempt to straighten and reuse a bent needle. If this happens frequently, check that you're using a fresh syringe each time — needles dull after a single use.
Frequently Asked Questions
How many times can I use the same insulin syringe? Once. Insulin syringes are single-use devices. The needle dulls significantly after the first use, making subsequent injections more painful and increasing contamination risk. They are inexpensive — a box of 100 costs $15–25.
Can I inject two different peptides in the same syringe? It's possible to draw two peptides into the same syringe (called "stacking in the syringe"), but it's generally not recommended unless your prescriber specifically confirms compatibility. Different peptides may interact chemically in solution. The safer practice is separate syringes for separate peptides.
Does it matter which hand I use? Use your dominant hand for the syringe and your non-dominant hand for the skin pinch. This gives you the most control over the injection.
What if I miss a dose? Take it when you remember. If it's close to your next scheduled dose, skip the missed one and continue your regular schedule. Don't double up. Missing a single dose has minimal impact on most peptide protocols.
How do I dispose of syringes? Place used syringes in a sharps container. When the container is three-quarters full, seal it and check your local health department or pharmacy for sharps disposal options. Many pharmacies and fire stations accept sharps containers. Never place loose needles in regular trash or recycling.
Can I inject through clothing? No. Always inject through clean, bare skin that has been swabbed with alcohol. Injecting through clothing increases contamination risk.
I'm terrified of needles. Is there an alternative? Some peptides are available in oral, sublingual, or nasal forms (BPC-157 oral capsules, Semax/Selank nasal sprays). These routes generally have lower bioavailability but avoid needles entirely. Discuss options with your healthcare provider.
Related Tools & Guides
- Reconstitution Calculator — Calculate exact dose volumes and syringe units
- Mixing & Administration Guide — Complete injection site map and technique tutorial
- Protocol Builder — Build injection schedules with timing and site rotation
- Beginner's Guide — Full onboarding for first-time peptide users
- Cost Calculator — Estimate supply costs including syringes and swabs
Related Articles
- How to Reconstitute Peptides: Step-by-Step Guide
- Mixing & Administration Guide — Covers injection sites, syringe selection, and administration technique
- Beginner's Guide to Peptides — Start here if you're new to peptide research
- BPC-157: The Complete Guide
- TB-500: The Complete Guide
- How to Evaluate a Peptide Vendor: A Complete 20-Criterion Framework
- Are Peptides Legal? 2026 Country-by-Country Guide
Sources
- Frid, A. H. et al. (2016). New insulin delivery recommendations. Mayo Clinic Proceedings, 91(9), 1231–1255. PMID: 27594187
- Gibney, M. A. et al. (2010). Skin and subcutaneous adipose layer thickness in adults with diabetes at sites used for insulin injections. Current Medical Research and Opinion, 26(6), 1519–1530. PMID: 20429833
- Strauss, K. et al. (2019). FITTER recommendations for best practice in injection technique. Diabetes & Metabolism, 45(Suppl 1), S1–S78.
- Sikiric, P. et al. (2020). Stable Gastric Pentadecapeptide BPC 157, Robert's Stomach Cytoprotection/Adaptive Cytoprotection/Organoprotection, and Selye's Stress Coping Response: Progress, Achievements, and the Future. Gut and liver, 14(2), 153-167. PMID: 31158953
- Goldstein, A. L. & Kleinman, H. K. (2005). Thymosin β4: actin-sequestering protein moonlights to repair injured tissues. Trends in Molecular Medicine, 11(9), 421–429. PMID: 16099219
- American Diabetes Association. (2004). Insulin administration. Diabetes Care, 27(Suppl 1), S106–S109.
Medical Disclaimer: This guide is for educational and informational purposes only. It does not constitute medical advice, diagnosis, or treatment. Peptide injection should be performed under the guidance of a licensed healthcare professional. Improper injection technique can result in infection, nerve injury, or other complications. Always follow your healthcare provider's specific instructions.
© 2026 GreyPeptides.com — All rights reserved.
This article is for educational purposes only and does not constitute medical advice. Consult a licensed medical professional before considering any peptide therapy.
Related tools
Encyclopedia entries
Get the next guide first
New peptide research guides and tool launches — no spam, unsubscribe anytime.